PageDesign

Saturday, June 22, 2013

Glaze of Glory


A few months ago, I had a client call me up to ask me to refinish a nightstand for her. Someone else had tried refinishing this piece for her, but the color and technique didn't go with the other pieces I had already done for her. Since I have had more than one person tell me that they want to know how I glaze my furniture, I thought it was time to write a tutorial.

The 3 Rules of Glazing

Rule #1: Learn to be a slob. That's right. It's ok to be a slob when you glaze - throw that wet towel on the floor, leave your dishes on the counter, or just refuse to make your bed. You can tell your family you're just practicing good painting skills. Why? Because, you absolutely cannot be a perfectionist when it comes to glazing. It is going to be darker in some spots than others, and that's ok!

Rule #2: Make a manicure appointment. (Or just wear gloves.) Your finger nails will get unbelievably dirty! Glazing should be listed as one the Dirtiest Jobs. But, but it's a good excuse to get a manicure! Unfortunately for me me, my husband figured out gloves are way cheaper than a manicure.

Rule #3: "Have patience, have patience don't be in such a hurry." Make sure you have allowed your base coat of paint to dry and cure for at least 48 hours before glazing. Glaze is water based, and chances are so is your paint. If you begin glazing too soon, it will only reactivate your paint and cause it to peel.

Now that we've covered the basics, let's get started on the step-b- step details!

Materials Needed:
Paint brush, cloth rags, bowl of water, Valspar Antique Glaze 

3 Steps to Glazing Anything

Step 1: Sand, prime and paint your piece of furniture. Let dry for 48 hours.

Step 2
Step 2: Using a brush or rag, begin glazing your furniture focusing on one small section at a time. The glaze typically begins drying in 10-15 minutes depending on the outside temperature and humidity conditions.

I like to pour the glaze into the top of the container. It is easier to handle while I'm glazing, and it makes it easy to pour back in any left overs when done.

To rag on the glaze you simply dip your cloth into water and ring out any excess. You want your cloth to be damp, but not dripping wet.

Next, you dip your damp rag into the glaze and put on a coat of glaze. Don't worry about it being too dark at this point. Glaze is super easy to lighten up once your put it on. The water will be your best friend during this process!

To brush on the glaze, you simply dip your brush into the water prior to brushing the glaze onto your piece. Simple as that!

Step 3: Wipe off the excess glaze.
Step 3

Take a clean cloth and begin ragging off your glaze. If you want a dark glaze, use a dry rag to wipe off the excess. If you want a lighter finish, dip your clean rag in the water. Try to "push" the glaze towards the corners and into any crevices found on your piece. Remember, glaze is suppose to resemble dirt, oil and wax build up found on antique furniture.

This process takes a little time. You have to work the glaze around until you have the right color for you. If you want to take more glaze off, simply dip your rag in the water bowl and rag away.

This is the part where you have to lay your perfectionism aside. You will start to pick apart every little imperfection in the glaze, but that is what makes glaze an antiquing technique - it gives your piece imperfections! You don't want it to look perfect, you want it to look aged.

Now, step back and admire your finished product!


A Few Tips to Consider

I personally think how you paint the piece will determine how your glaze looks. I prefer to use a brush when painting a piece I will be glazing. The brush strokes left in the paint from your brush will leave tiny crevices for your glaze to fall into on the flat services. 

If you will be using a latex paint, the best paint I have found is Behr found at Home Depot. I have tried other top brands and hardware store brands, but I keep going back to Behr for my latex paint of choice.

If you prepare and paint your piece correctly, you don't "need" a special top coat, however, I always like to add an extra coat of protection. For this piece, I used a soft wax finish. If it was a desk or dining room table, I would use a water based polycrylic finish.

Let me know if you have any questions on how to finish your piece of furniture!


Tuesday, January 8, 2013

Marshall's Place


You always hear people talk about "preparing" for their child's arrival. Let me tell you, there is nothing you can do to prepare for a child. After reading tons of books about breastfeeding vs formula, cloth vs disposable diapers, the 5 S's, and the most important question of all...to have or not to have an epidural! I finally decided enough was enough, and I was just going to "wing it" as a new mom. And, that would be why I only just finished my son's nursery two months after his birth! I have to say that it is my favorite room in the house, probably because it's the only one that feels complete.


I started planning Marshall's nursery before I even knew if he was a boy or a girl. I was shopping at Kirkland's with my Mother-in-Law at Easter, and found this adorable rabbit lamp! I fell in love with it at once, and it reminded me of one of my favorite stories as a little girl, The Velveteen Rabbit. I decided that would be my nursery theme and got started! 

I knew I wanted the walls to be grey, because I think grey is the perfect neutral color. I just had to figure out which grey I was going to choose. I thought (key word here is thought!) I had the perfect gray picked out, and purchased 2 gallons of Benjamin Moore paint. I heard it was the best for nurseries because it has zero odor, and being the good mother that I am, I wanted only the best for my baby! Well, as the story goes, Jason stayed up until 2:00 am one morning to surprise me by cutting in the paint at the ceiling and baseboards. I'm still not sure if he did that to surprise me, or because he knew I would get paint all over the ceiling, and he would end up on the latter repainting the ceiling any way! I walked in the room that morning and realized the color was all wrong. It was too dark for a nursery. One thing I have learned from dealing with paint is that you can always go back to the store and have them make your paint darker, but they cannot lighten the color for you. So, it was back to the drawing board and the paint store for us. I finally decided on Benjamin Moore's London Fog.

Now, I had the base for my nursery - gray, neutral walls and a theme - The Velveteen Rabbit. Here's a list of projects we completed to make the nursery perfect!

We took a vintage (of course!) dresser, and painted it, distressed it and waxed it. Then added a changing pad on top, and we have our very own custom changing table.


The wall above the changing table was looking a bit bare, so I asked Jason to make a shelf for me. He took a couple of pieces of barn wood and added the two wooden brackets I painted to match the dresser. The easiest project we've ever done!

On either side of the window I hung the mirror that came with the vintage dresser and an antique window we found in Jefferson, TX for only $5! The glass was really dingy looking, so Jason suggested we have the glass replaced. After a trip to Lowe's, I was ready to start painting! I painted the frame then printed off 1 Samuel 1:27-28 in a free font I found through Pinterest. I cut out the words, taped them to the mirror, and traced it with a black paint pen I purchased from Hobby Lobby.


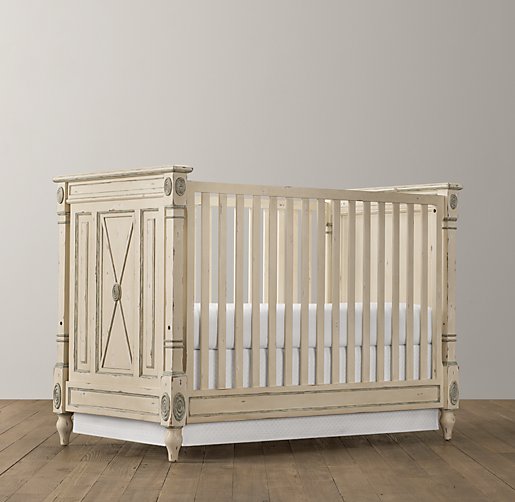
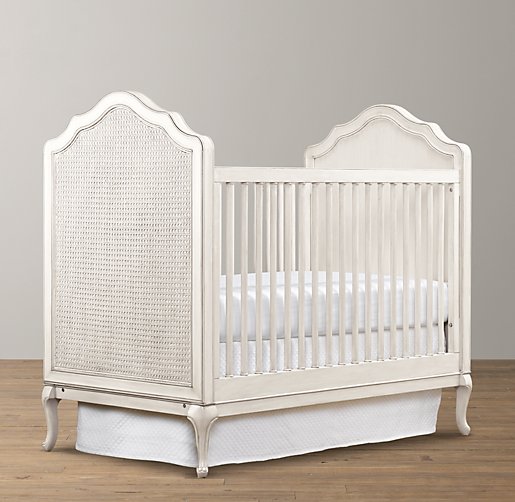
Next on our list was a crib. I started off falling in love with these two cribs from Restoration Hardware. With $1,000 price tags though, I knew I needed to keep looking. After scouring Craigslist, Babies R Us, Buy Buy Baby and Pottery Barn I thought I would never find a crib I loved.

Jourdan Crib  Adele Crib

I decided to give Babies R Us one last look, and that's when I found our crib. They had just put it out on the floor that day, and I couldn't have been more excited! Plus with a price tag of only $299, I thought I had struck gold!


The canvases above the crib I have had for 3 years. I kept wanting to use them in our master bedroom, but I never could decide what to paint on them. I'm so glad I didn't use them now. I saw a tutorial on making your own chevron print on one of my favorite blogs, Dear Lillie. I then used Mod Podge to apply the pictures I took from The Velveteen Rabbit book. 

After hanging them on the wall it was still missing something. That's when I decided to add the name sign above them. Jason, being the super crafty husband that he is, took a few pieces of barn wood (my new favorite thing!) and created this great sign for me. I just used a wooden letter from Hobby Lobby along with some stencil letters to create Marshall's sign.


The final piece we added to Marshall's nursery was this bookcase that Jason built. We had it sitting in our guest room, but it was nothing to look at. I never gave it a second thought. Jason brought it home from work one day because they were going to throw it away. He said he would do something to it to make it look nice for our guest room. Well, like my canvases, we never started that project until we decided we needed a bookshelf for the nursery. I found the feet at Lowe's, and Jason had the crown molding left over from another job. He worked his carpentry magic on it, and this is what we came out with! Isn't it beautiful? I wish I had a before picture. I'm sure Jason has one somewhere. If I find one, I will post the before, so you can really see the transformation on this piece.